A Trustworthy PCB and Electronic Manufacturing Enterprise! Contact Us


An excellent PCB designer is also an outstanding artist. However, with the widespread commercialization of 5G and the proliferation of IoT devices, circuit board traces are becoming increasingly intricate, signal frequencies are rising, and electromagnetic interference issues are growing more severe. PCB designers must confront a practical reality: PCBs are now functioning as components with resistive, capacitive, and inductive properties, rather than merely serving as platforms for connecting wires as they did a decade ago. Electromagnetic compatibility (EMC) and signal integrity (SI) concerns are becoming increasingly prominent, demanding higher standards for PCB routing and component placement.
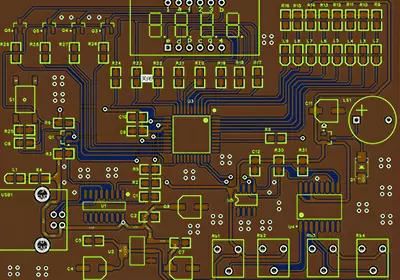
10 Rules for Component Placement:
1. Follow the "large-to-small, difficult-to-easy" placement principle: prioritize critical circuit units and core components.
2. Reference the schematic diagram during layout, arranging primary components according to the board's main signal flow patterns.
3. Arrange components to facilitate debugging and maintenance. Avoid placing large components near small ones, and ensure sufficient clearance around components requiring adjustment.
4. For structurally identical circuit sections, adopt symmetrical standard layouts whenever possible.
5. Optimize layout based on uniform distribution, balanced center of gravity, and visual aesthetics.
6. Place similar through-hole components in the same direction along either the X or Y axis. Similarly, polarized discrete components of the same type should also be oriented consistently along the X or Y axis to facilitate production and inspection.
7. Heat-generating components should generally be distributed evenly to aid heat dissipation for both the board and the entire device. Temperature-sensitive components, except for temperature sensors, should be kept away from high-heat-generating components.
8. Layout should meet the following requirements: minimize overall trace lengths, especially for critical signals; completely separate high-voltage/high-current signals from low-voltage/low-current weak signals; isolate analog and digital signals; separate high-frequency and low-frequency signals; ensure adequate spacing for high-frequency components.
9. Decoupling capacitors should be placed as close as possible to the IC's power pins, forming the shortest possible loop between power and ground. 10. When placing components, consider grouping devices sharing the same power supply to facilitate future power isolation.
Basic Rules for PCB Routing
1. Control Trace Direction
Input and output traces should avoid adjacent parallel routing. When routing on PCB layers, maintain orthogonal routing directions between adjacent layers to ensure proper signal integrity. Avoid routing different signal traces in the same direction on adjacent layers to minimize unnecessary crosstalk. When parallel routing is unavoidable due to structural constraints (e.g., certain backplanes), especially at higher signal rates, consider isolating routing layers with ground planes and isolating signal traces with ground traces. The schematic diagram of routing directions on adjacent layers is shown below.

2. Check for Open-Loop and Closed-Loop Routing
During PCB routing, to prevent "antenna effects" and reduce unnecessary interference radiation and reception, routing with one end left floating is generally prohibited, as it may lead to unpredictable outcomes. Prevent signal lines from forming self-loops between different layers. This issue is common in multilayer board designs, and self-loops can cause radiated interference.
3. Controlling Trace Length
a. Minimize trace length: During PCB routing, traces should be kept as short as possible to reduce interference caused by length.
b. Adjust trace length: Digital circuit systems impose strict timing requirements. To meet signal timing specifications, adjusting trace lengths on the PCB has become an integral part of PCB design.
Trace length adjustment involves two key requirements:
a. Maintain consistent trace lengths to ensure signals arrive synchronously at multiple receivers. When signal groups on a PCB share dependencies (e.g., buses), length compensation is necessary for receiver synchronization. The adjustment method involves identifying the longest trace and adjusting others to match its length.
b. Controlling the delay between two components to a predetermined value. For example, the delay between controllers A and B might be specified as 1ns. Such requirements are typically proposed by circuit designers but implemented by PCB engineers. Note that signal propagation speed on a PCB depends on factors like material, trace structure, trace width, and vias. The required trace delay can be calculated based on the signal propagation speed to determine the corresponding trace length. Adjusting trace length commonly employs serpentine routing.
4. Controlling Branch Length
During PCB routing, minimize branch lengths as much as possible. Additionally, trace delay t(delay) is typically required to be ≤ t(rise)/20, where t(rise) is the rise time of the digital signal.

5. Corner Design
During PCB routing, traces inevitably encounter bends. Sharp corners (right angles) generate additional parasitic capacitance and inductance. Avoid designing traces with acute or right-angle bends to prevent unnecessary radiation. Moreover, acute and right-angle bends exhibit poor manufacturing and performance characteristics. All trace intersections should be greater than or equal to 135°. When right-angle turns are unavoidable, two improvement methods exist: converting the 90° turn into two 45° turns or employing rounded corners. Rounded corners are optimal, while 45° turns remain viable up to 10GHz. For 45° turns, the corner length should ideally satisfy L ≥ 3π.
6. Differential Pair Routing
To avoid the impact of unrouted return paths, differential pair routing can be employed. For superior signal integrity, differential pairs are recommended for high-speed signal transmission. The previously discussed LVDS level transmission utilizes differential transmission lines.
A. Advantages of Differential Signal Transmission:
a. Significantly reduces the total di/dt of the output driver, minimizing rail sag and potential electromagnetic interference.
b. Differential amplifiers in receivers offer higher gain compared to single-ended amplifiers.
c. Differential signals transmitted in a tightly coupled differential pair exhibit greater robustness against crosstalk and glitches in the return path.
d. Each signal has its own return path, making differential signals less susceptible to switching noise when passing through connectors or packages.
B. Disadvantages of differential signals:
a. EMI issues may arise if differential signals are not properly balanced or filtered, or if any common-mode signals are present.
b. Transmitting differential signals requires twice the number of signal lines compared to single-ended signals.
C. When designing differential pair traces, adhere to the following principles:
a. Maintain a constant trace spacing S between the two signals throughout the trace.
b. Ensure D > 2S to minimize crosstalk between the two differential pair signals.
c. Set the trace spacing S to satisfy S = 3H to minimize component reflection impedance.
d. Maintain equal lengths for both differential signal traces to eliminate phase differences.
e. Avoid using multiple vias on differential pairs, as vias introduce impedance mismatch and inductance.
7. Controlling PCB Trace Impedance and Termination Matching
In high-speed digital and RF PCB designs, PCB trace impedance is critical and must be controlled. During PCB routing, maintain consistent trace widths for the same network. Variations in trace width cause non-uniform characteristic impedance, inducing reflections in high-speed digital signals. Design should minimize such variations. Where unavoidable (e.g., connector leads, BGA package pins), control and reduce the effective length of inconsistent sections.
In high-speed digital circuits, when the PCB routing delay exceeds one-quarter of the signal rise time (or fall time), the routing can be treated as a transmission line. To ensure proper impedance matching between signal input/output impedances and the transmission line, various network termination methods can be employed. The chosen method depends on the network connection configuration and routing topology.
8. Designing Ground Protection Routing
In analog PCB design, shielded traces are widely employed. For instance, in a two-layer board lacking a full ground plane, running a pair of ground traces parallel to sensitive audio input traces can reduce crosstalk by an order of magnitude.
In digital circuits, a full ground plane can replace shielded traces, though shielded traces offer advantages over a full ground plane in many scenarios.
Empirical evidence shows that inserting a third trace grounded at both ends between two microstrip lines halves the coupling between them. If this third trace connects to the ground plane via multiple vias, coupling is further reduced. When multiple ground planes exist, ground each shield trace at both ends rather than centrally.
Note: In digital circuits, if the distance (spacing) between two traces is sufficient to allow the introduction of a shield trace, the coupling between the traces is typically already low. Therefore, it is often unnecessary to add a ground shield trace.
9. Preventing Trace Resonance
During PCB routing, trace lengths should not be integer multiples of their wavelength to avoid resonance phenomena.
